Hey, it’s Taka.
I know that feeling.
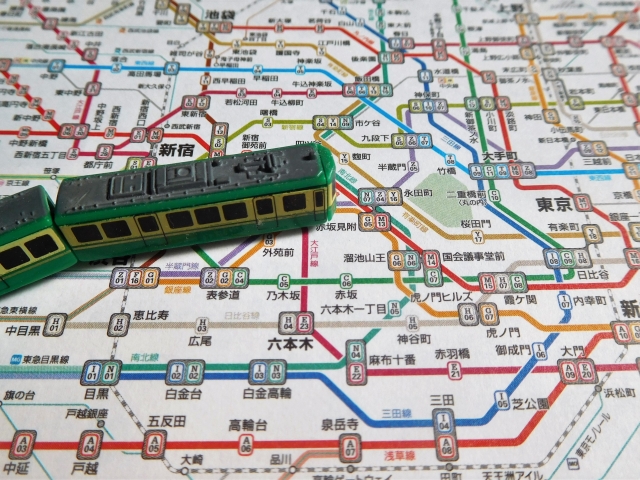
You’re standing in a station, looking at a Japanese train map, and it feels like staring into a colorful bowl of spaghetti.
It seems impossibly complex.
But I promise you, by the time you finish this guide, you’ll be navigating this country as freely as if you were born and raised here.
This isn’t just another list of facts.
I’ve poured everything into this single article: all the knowledge I’ve gathered over a lifetime, all the common mistakes I’ve watched my foreign friends make, and all the little secrets that only a local would know.
This is my personal guide, from me to you.
Let’s master Japan’s transportation together.
Chapter 1: Your Key to Japan – The Absolute Essentials of IC Cards
First things first, let’s talk about your most powerful ally in Japan: the IC card.
Think of it as a magic wand for your trip.
With a simple tap, you can pay for trains, buses, vending machines, and even your morning coffee at a convenience store.
It completely frees you from the hell of fumbling for coins and buying paper tickets for every single ride.
【Taka’s Advice】The Best Cards for Tourists Right Now
Due to a global semiconductor shortage, the sale of regular, anonymous Suica and PASMO cards has been suspended for now.
So for travelers, the best options are these special tourist versions.
- Welcome Suica: This is the tourist version from JR East, featuring a cute cherry blossom design.
- PASMO PASSPORT: The tourist version from the private railways in Tokyo, with Sanrio characters on it.
Honestly, they are functionally identical and can be used on nearly all transportation systems across Japan.
Just pick whichever one is available at your arrival airport or major station.
To buy one, you’ll need to show your passport to prove you’re a short-term visitor, and you’ll need cash to load onto it.
But here’s a crucial point: Unlike the regular cards, these tourist versions are valid for only 28 days, and you cannot get a refund for any remaining balance.
So, my personal advice is to try and use up all the credit by the end of your trip!
【Taka’s Secret Tips】The Ultimate Hack for iPhone Users
If you have an iPhone, you can unlock the ultimate level of convenience.
You can add a Suica or PASMO directly to your Apple Wallet.
I’ll never forget the first time I did this.
Walking through the ticket gate by just tapping my phone felt like I was living in the future.
You don’t even need to take a physical card out; you just tap your phone.
Plus, you can recharge it anytime, anywhere, directly from your phone using a credit card.
It’s the ultimate experience in seamless travel.
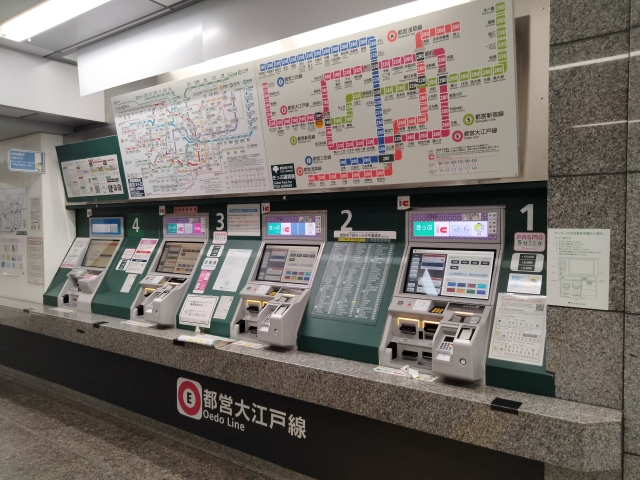
How to Recharge (Top Up) Your Physical Card
When your balance gets low, you can easily add money at any ticket vending machine in any train station.
The process is simple:
- Look for the “English” button on the screen.
- Insert your IC card into the slot.
- Select “Charge” and choose the amount you want to add.
- Insert cash.
- Take your card and receipt.
It’s that easy.
Chapter 2: The Backbone of Your Trip – Mastering Local Trains & Subways
Now that you have your IC card, let’s conquer the local train and subway systems.
These are the veins and arteries of daily life in Japan.
When you get to the platform, look at the electronic display boards.
They will tell you the train’s destination and, most importantly, what type of train it is.
【Common Mistakes】The Mistake That Cost Me 30 Minutes of My Life
This is where many travelers get confused, and I have to confess, even I have made this mistake.
Not all trains on the same line stop at the same stations.
Years ago, I was meeting a friend and jumped on the first train that arrived, only to watch in horror as it flew past his station.
I was on a Rapid train when I should have been on a Local one.
It was a 30-minute lesson I never forgot.
Here’s the breakdown so you don’t repeat my failure:
- Local (各駅停車 – Kakueki-teisha): Stops at every single station. The slow and steady tortoise.
- Rapid (快速 – Kaisoku): Skips some of the smaller stations.
- Express (急行 – Kyūkō): Skips even more stations.
- Limited Express (特急 – Tokkyū): The hare. Stops only at major hub stations and often requires a separate express ticket.
My advice? Always use an app like Google Maps.
It will tell you exactly which train type to take and save you from the shame I once felt.
A Complete Guide to Getting On and Off
At the ticket gate, just tap your IC card on the blue glowing panel and walk through.
On the platform, you’ll see people lining up neatly where the train doors will open.
Find a line and join the back.
Once on the train, there are a few etiquette points I want to share from a local’s perspective.
Keep your conversations quiet and please, avoid talking on the phone.
If the train is crowded, it’s a small act of kindness to hold your backpack in front of you or put it on the overhead rack.
And if you see the priority seats, please leave them for the elderly, pregnant women, or people with disabilities.
The “Fare Adjustment Machine”: Your Savior When You Mess Up
If you stay on the train too long or get the fare wrong with a paper ticket, don’t panic.
We’ve all been there.
Near the exit gates of every station, you’ll find “Fare Adjustment Machines” (精算機 – Seisan-ki).
Just insert your ticket or IC card, and the machine will tell you how much extra you need to pay.
It’s a lifesaver that has saved me from embarrassment more than once.
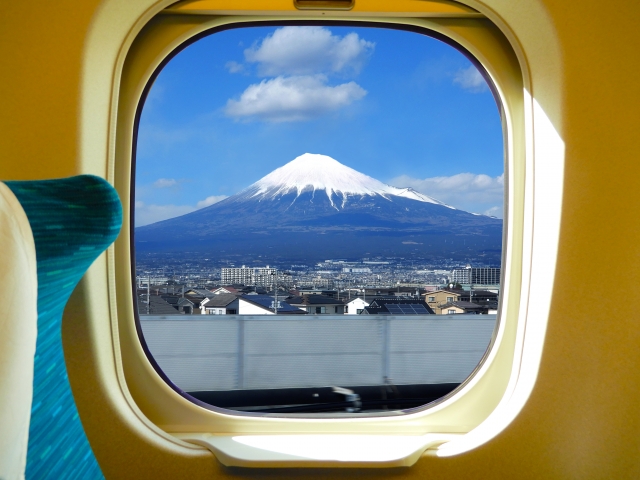
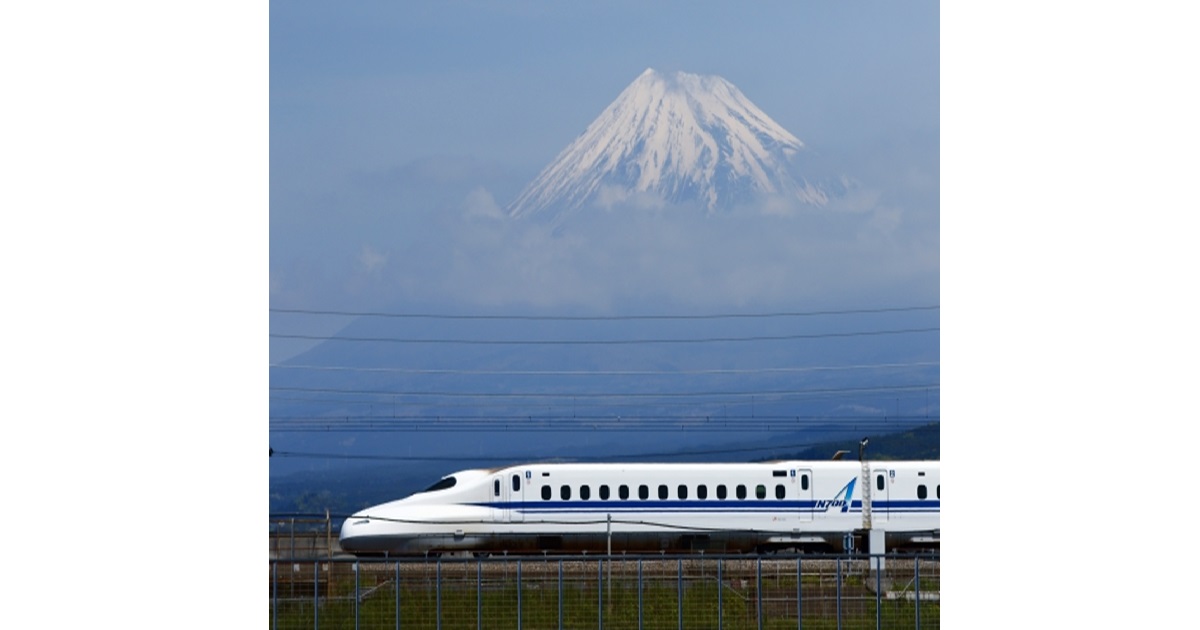
Chapter 3: The Icon of Japan – A Perfect Journey on the Shinkansen
Ah, the Shinkansen.
For me, it’s more than just a fast train; it’s a symbol of Japanese pride and a truly special travel experience.
The feeling of gliding smoothly and silently through the countryside at incredible speeds is something you have to feel to believe.
【Taka’s Recommended】Booking Your Ticket Online is the Only Choice
You can buy tickets at the station’s “Midori no Madoguchi” (the green ticket office), but I’ve seen so many tourists waiting in long lines, looking stressed and confused.
Your vacation time is too precious for that.
My advice is simple: book your tickets online in advance.
It’s much easier, you can do it in English, and you can secure your seats without any hassle.
A site like Klook is extremely user-friendly for this.
Choosing Your Seat: A Breakdown
You have three main choices for seats.
Here’s my personal take:
- Non-Reserved (自由席 – Jiyūseki): Cheaper, but you’re not guaranteed a seat. During busy seasons, I’ve seen people standing for hours. I never recommend this to my friends.
- Reserved (指定席 – Shiteiseki): This is my strong recommendation. For a small extra fee, you get an assigned seat. You can relax knowing your spot is waiting. This is the choice for a stress-free trip.
- Green Car (グリーン車): This is our version of first class. The seats are wider, there’s more legroom, and it’s a very quiet and luxurious experience. If you want to treat yourself, this is it.
【Taka’s Favorite】My Ritual: The “Ekiben” Experience
One of my favorite parts of any Shinkansen trip is the “Ekiben” (駅弁).
These are bento lunch boxes sold at train stations, and they are a huge part of our travel culture.
Each region has its own unique Ekiben featuring local specialties.
For me, it’s a ritual.
Grabbing a local beer and an interesting-looking Ekiben before boarding, then enjoying it while watching the scenery fly by… that, for me, is the perfect Shinkansen experience.

【Crucial Info】The Oversized Baggage Rule You Must Know
This is a recent rule that is very important for travelers with large suitcases.
On the major Tokaido, Sanyo, and Kyushu Shinkansen lines, if your luggage has total dimensions (length + width + height) between 161cm and 250cm, you MUST make a reservation for an “oversized baggage” seat in advance.
Don’t just show up with a giant suitcase, or you’ll be in trouble.
If you book online, there will be an option to select this type of seat.
【Money-Saving Hack】Is the Japan Rail Pass Actually Worth It?
The Japan Rail Pass (JR Pass) can be an amazing deal, but it’s not for everyone.
It gives you unlimited travel on most JR trains, including many Shinkansen, for a fixed period.
Here’s my simple rule of thumb: if you are planning a round-trip between Tokyo and Kyoto within 7 days, the pass will likely pay for itself.
If you add one more major city, like Hiroshima, it’s almost certainly a great deal.
But if you’re only staying in one city, you absolutely do not need it.
Do the math first: plan your long-distance travel, calculate the individual ticket costs, and then compare it to the price of the pass.
Chapter 4: Other Smart Ways to Get Around
To make this a truly “ultimate” guide, here are a few other options that I often use myself.
Rental Bicycles
For exploring a specific city or town, a rental bicycle is my absolute favorite option.
It’s perfect for cities like Kyoto, Kamakura, or Onomichi.
You can cover more ground than walking but still have the freedom to stop wherever you like.
The feeling of the wind as you ride alongside the Kamogawa River in Kyoto is a memory I cherish.
Many train stations have rental shops nearby.
Highway Buses – The Smart Traveler’s Choice
For long-distance travel, the highway bus is the ultimate money-saver.
It often costs less than half the price of a Shinkansen ticket.
The “night bus” (夜行バス – yakō basu) is a fantastic hack I used a lot when I was younger.
You travel while you sleep, saving on a night’s accommodation and waking up in your next destination.
My advice? For an overnight journey, spend a little extra for a “3-row seat.”
It gives you much more personal space and makes a huge difference in your sleep quality.
Chapter 5: When You Need It Most – Taxis & Ride-Sharing
Sometimes, a taxi is simply the best option.
Especially when you’re tired, lost, or dragging heavy luggage after a long flight.
The Magic Automatic Door
I’ll never forget bringing my American friend, Mike, to Japan for the first time.
When he went to hail a taxi, the rear left door swung open by itself.
He literally jumped back in surprise, thinking it was some kind of ghost.
The driver and I couldn’t stop laughing.
Remember this: the door opens and closes for you.
It’s a signature feature of Japanese taxis, so don’t be amazed like Mike was!
【Taka’s Secret Tips】Let an App Break the Language Barrier
Explaining a complicated address to a driver in Japanese can be stressful, even for me sometimes.
That’s why I almost always use a taxi app now.
You set your destination directly in the app, so there’s no need for a verbal explanation.
It’s foolproof.
The two best apps in Japan are GO and Uber.
GO is the largest local app with more cars, while Uber is familiar to many international visitors.
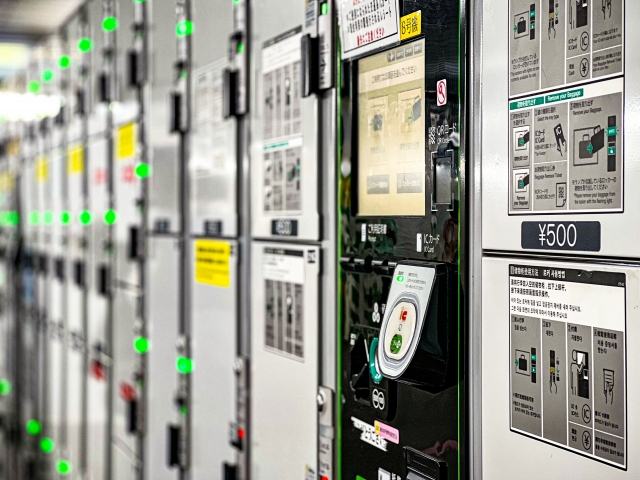
Chapter 6: A Traveler’s Best Friend – How to Use Japan’s Coin Lockers
I want to let you in on a secret weapon for smart travel in Japan: the coin locker.
Imagine this: you’ve just checked out of your hotel, but your flight isn’t until the evening.
Do you drag your heavy suitcase around all day?
Absolutely not.
You find a coin locker. You’ll find them inside or right outside almost every train station.
How to Use Them: The Old vs. The New
There are two main types:
- Key-Operated Lockers: The classic style. You put your luggage in, insert 100-yen coins, and turn the key. Simple, but you need cash.
- Electronic Lockers: The modern type. You use a central touchscreen to pay with your IC card (like Suica). Your IC card itself becomes the key. It’s incredibly convenient.
【Common Mistakes】What to Do When All Lockers Are Full
At popular stations like Shinjuku, finding an empty locker can be a real challenge.
I’ve been there, sweating, running from one bank of lockers to another.
If you’re faced with this, don’t panic.
Look for a “Temporary Luggage Storage” counter (手荷物一時預かり – Tenimotsu Ichiji Azukari).
Many major stations have these staffed counters where you can leave your bags for a fee.
It might cost a little more, but it’s a guaranteed solution that will save your sanity.
Chapter 7: Taka’s Final Words & Ultimate Tool-Kit
My Must-Have Apps for Travel in Japan
These are the three apps that are always on my phone when I travel in my own country:
- Google Maps: The best all-rounder for train routes, walking directions, and finding places.
- Japan Travel by NAVITIME: Excellent for details like platform numbers and finding JR Pass-friendly routes.
- Google Translate: The camera function is a lifesaver for reading menus and signs you don’t understand.
My Final Message to You
Japan’s transportation system can seem intimidating from the outside.
But I promise you, it’s built on a very logical and user-friendly foundation.
With this guide in your hand, you are more than prepared.
And if you ever do get truly lost, just find the nearest station attendant, take a deep breath, and say “Sumimasen!” (Excuse me!).
I promise, you’ll be met with a desire to help.
Now, go and have the adventure of a lifetime.
– Taka